
Designing and making a folding 3D printer
Summary
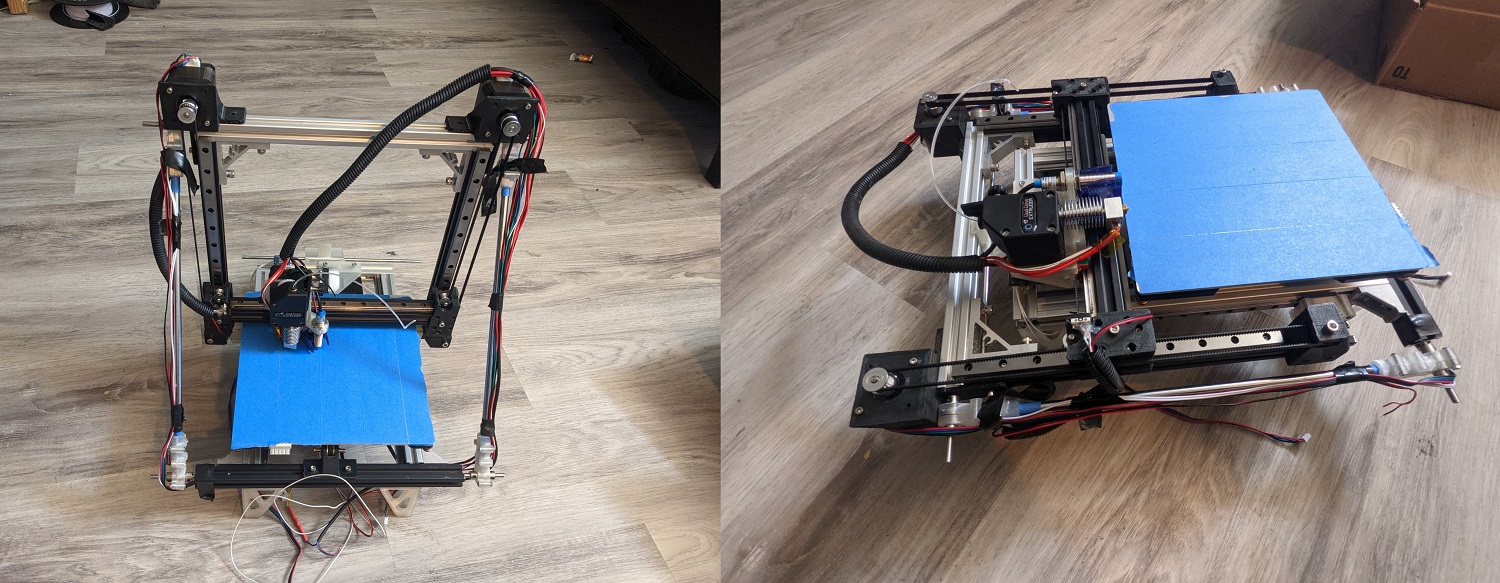
I wanted a printer that was quiet and compact, so I designed and contructed my own folding printer using Fusion 360, store-bought components, as well as 3d printed parts.
Background
As much as I loved my Ender 3, it was not suited to the dorm life. It is bulky, it is slow, but most importantly. it is loud. It was time for me to upgrade to a new printer which solved these issues. I couldn’t find any printers that satisfied all my requirements, so I decided to make my own. I had some electronics from an old Tevo Tarantua which I would put to use.
The design goals were simple: make it compact, make it print at least as well as my Ender 3, and make it as silent as possible. I wanted a print volume of at least 180mm by 180mm by 200mm, since any smaller and it would limit my ability to print certain things.
Designing the printer
Frame Geometry
The first thing I designed was the folding geometry in 2D. I came across a few various but found this to be the best one, since it was both compact when folded and sturdy when unfolded. After that, I modelled the frame in Fusion 360. It was designed to use as few 3D printed structural components as possible, since aluminum bolted together would be stronger.

Linear Movement
I decided to use linear rails rather than v-slot bearings due to their tighter tolerances and overall ease of use. They didn’t require tensioning or multiple axles and corresponding bearings. They would be more expensive, but the increased precision and robustness should be worth it.
Electronics
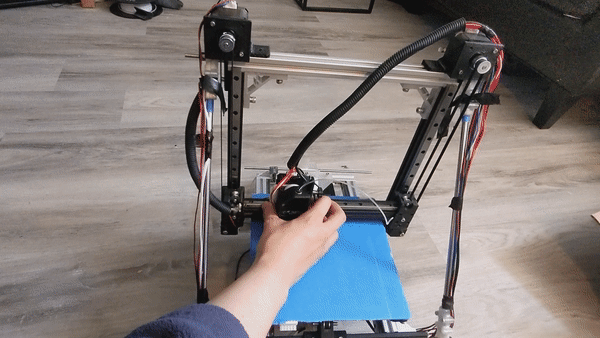
I already had a Raspberry Pi hooked up to it for Octoprint, so I decided to use the open source firmware, Klipper, to drive the printer. This should allow for increased reliability at faster speeds, as well as more flexibility over Marlin. The printer itself is driven by an MKS Gen L since it was what I had already. To make it as quiet as possible, I would use TMC2209 stepper drivers, which completely eliminate the whirring and buzzing of most stock printers. Lastly, the design calls for a Noctua fan instead of the stock hotend fan to reduce fan whine.
Extruder Design
There were two main choices: direct drive and or bowden tubes. Direct drive offers higher precision - especially with flexible filaments - at the cost of lower speed. Since the silent stepper drivers worked best at lower speeds anyways, I figured I might as well get better precision out of the printer, and decided to go with a direct drive setup.
Motor Placement
I designed the folding mechanism first, which was a bit of a mistake. I quickly realised that I had no space whatsoever on the outside of the vertical beams as the diagonal struts would be folded alongside them. In a traditional cartesian 3D printer, the x carriage stepper would be mounted there, so that wasn’t possible. I could mount the motor on the inside of the beams, but that would result in less space for the x carriage itself, resulting in less print volume than the 180mm I wanted.
As a result, I ended up using a core-xz design. The belt is oriented in an H-shape. When both motors turn in one direction, it moves along one axis, and when the motors turn in opposite directions, it moves along another. This allowed me to place both motors above the rest of the printer, out of the way of the struts as well as the x carriage. The entire z-axis assembly was still light enough to not put too much strain on the steppers.
Next Steps
The design is almost done! With the wire management complete, I just need to make permanent mounting locations for the control board and Raspberry Pi. It is still a work in progress, but I am happy with how it has turned out so far!