
Rubiks Cube Solving Robot
Summary
I used OpenCV and python to determine the moves needed to solve a rubik’s cube, designed a robot capable of executing those moves very quickly, and put it all together with the help of electronics I already had and my 3D printer.
Backstory
I found an old rubiks cube sitting on a shelf and started playing with it. I could solve it, but it would take me a minute or so. “Why do it myself when I could make a robot that does it better?” I thought. I had a broken 3D printer which had all the electronics I would need. Motors with precise angular control? Check. A control board with the stepper drivers? Check. A usb port to interface with a computer? Check.
All that was left was to put it together and make it work! (I would later come to regret that thinking)
The project was simple, then. I wanted to use the components I had on-hand to make a Rubik’s Cube solver. If it could solve it faster than me, I would count it a success.
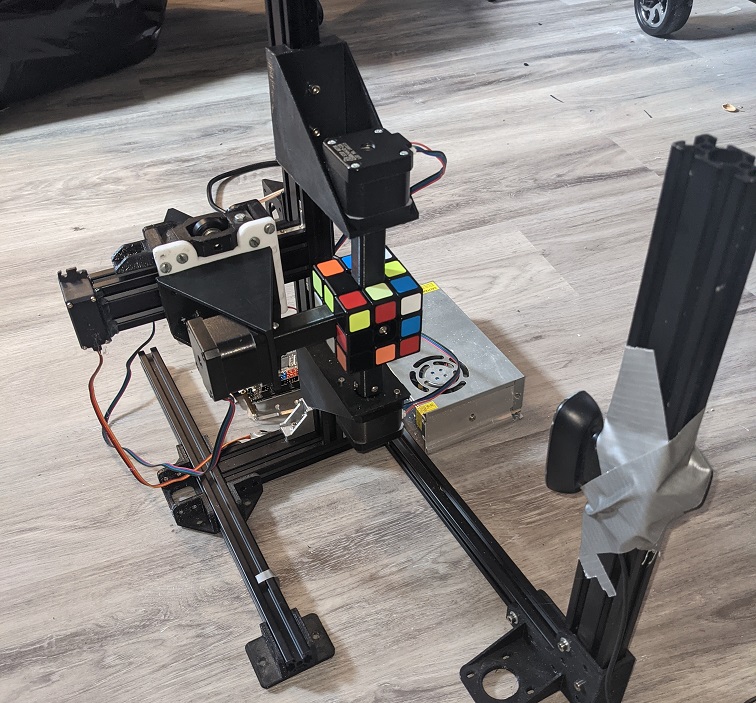
The robot in action:
Designing the hardware
Most of the frame was assembled from the aluminum extrusions which made up the printer. All I had to do was bolt them together and the biggest part (physically, anyways) was done.
Naturally, since there are 6 faces on a cube, the most straightforward way to rotate them all is to have one motor per face. I only had 3 stepper motors, however, so I had to make do with this coaxial design. The top and bottom motors could spin the top or bottom faces if the cube was locked, or it could spin the entire cube if the cube was not locked. A side motor could lock the cube and also spin that side face.
Here is the bot drawn up in Fusion 360:
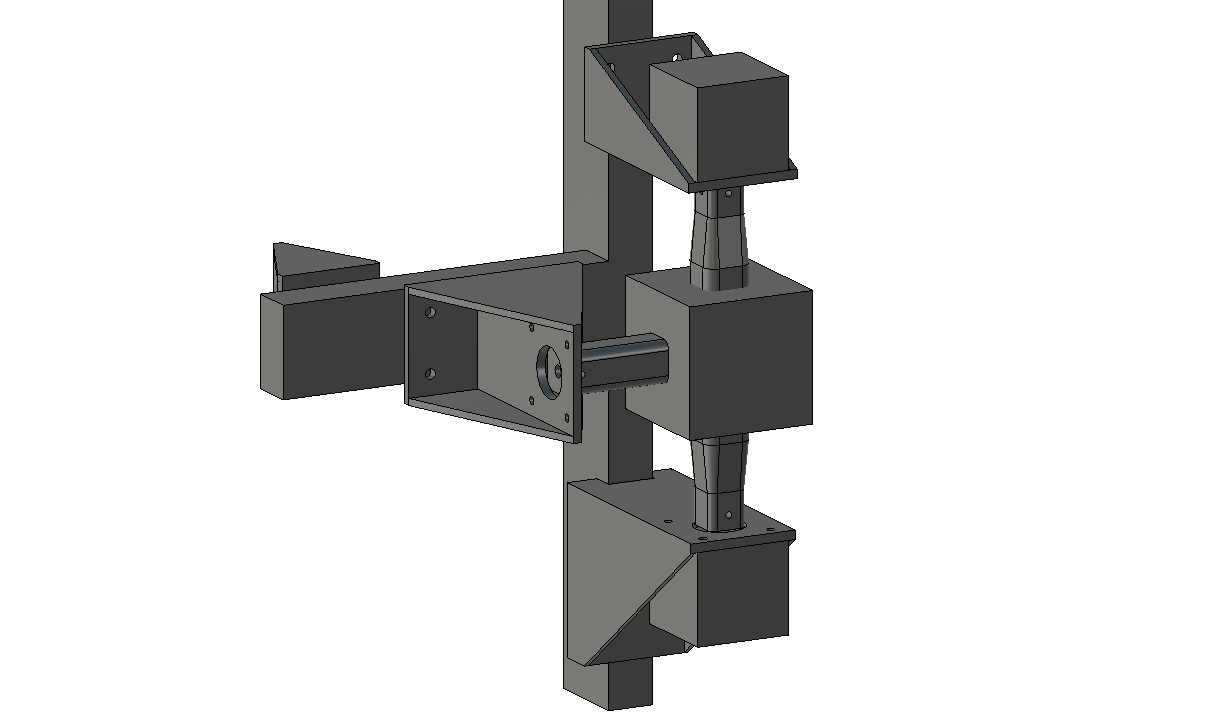 The only main printed components were the motor mounts and cube interfaces.
The side motor was mounted to a slider (formerly the x carriage of the 3d printer) which let it slot in and out of the cube. It was spring-loaded inwards with elastic bands, and a servo motor pulled it outwards when needed.
At first, I tried to design a cup shaped interface which would notch into the fillets around the center squares. However, this proved unreliable and I quickly switched to a design that slotted directly into the squares after I had taken those covers off.
After all that, the design was solid.
Writing the software
The first step was getting the motors to rotate at all. I used the stock 3d printer firmware, was able to send commands over a serial port.
Next, I wrote a python script which automated the serial port messages. From there, I used opencv to pull frames from the camera, and get the average color of known positions in each frame.
Those colors would be converted to the HSV colorspace, then be compared against known colors in a database to determine the color of each square.

Green was too similar to black, so I took the stickers off, resulting in black being the 6th color.
As much as I wish I could say I wrote the entire code myself, actually writing the algorithm to solve a rubiks cube would have been extremely tedious, not to mention very inefficient. Typical “beginner’s” algorithms could be hundreds of rotations or more, but every rubik’s cube has been proven to be solvable in 20 moves or less. I used a python library to determine the series of moves which would be needed to solve it.
A move consisted of a letter indicating one of six faces (top, bottom, left, front, right, back) as well as clockwise, counterclockwise, or 180 degrees.
Top and bottom rotations were easy. I could just make sure that the cube was locked, and rotate those motors. Sideways rotations were harder. I had to first unlock the cube, then rotate that face so it was facing the motor. Only then could I lock the cube again, and rotate that face.
Conclusion
The robot works and it could solve a cube in under 10 seconds! Even though it is some ~30x slower than MIT’s world record, it was still 6x faster than me, and I was happy.
Unfortunately, shortly after getting the entire system working reliably, the servo’s gears stripped and it was dead. I had not created this website at the time of making the project, so I had very little documentation. The video shown above was the most successful run that I had documented, being under 10 seconds and only one rotation away from solving the cube. I had completed all that I had set out to do, so I considered the project a success. In the future, maybe I’ll revisit the project, and solve a Rubik’s cube in under 5 or even 1 second.
For now though, the electronics have been once again recycled into a new project.